Tuesday, November 30, 2010

Sour Cream Cake With Coconut Frosting

I'm back! My loving husband gave me my Christmas present early because he knew I was spiraling into a camera-less funk. He got me the Canon T2i which takes terrific low light photographs. To celebrate I baked this cake, well not really, it is for my father-in-law's birthday today but it can do double duty.


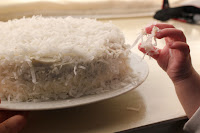
The pictures above are from Baby Girl helping herself while I tried to take a photograph.

I had left over coconut from my Thanksgiving coconut cream pies so rather than have the coconut sit in the cupboard until next coconut cream pie I decided to make a sour cream cake with coconut frosting. I picked the sour cream cake because I had all the ingredients and we pretty much have no food in my house after the holiday and then a couple days of food poisoning and a sick baby.

Sour Cream Cake
  • 1 3/4 cup flour - called for cake flour but I just used regular.
  • 1/4 teaspoon baking soda
  • 1 3/4 teaspoon baking powder
  • 1/3 cup butter
  • 1 cup sugar
  • 2 egg yolks
  • 1 cup sour cream
  • 2 egg whites
Baby Girl begging for more coconut!
  1. Preheat oven 375 degrees 
  2. Sift flour, baking soda, baking powder
  3. Whip egg whites until stiff but not dry, put in separate bowl 
  4. Cream butter until soft and gradually add sifted sugar and cream until light
  5. Beat in eggs yolks and vanilla
  6. Add the sifted flour mixture to the butter mixture and add the sour cream. Stir the batter until smooth
  7. Fold in egg whites 
  8. Bake in greased and flour pans for about 25 minutes
I frosted with some store bought vanilla frosting and then covered with shredded coconut! I love this technique because it is quick and hides any less-than-perfect frosting application, which is clearly not an issue for me but I am just saying...

Saturday, November 13, 2010

Felt Birds

First of all let me say that I know these photos blow. I am still without my nice camera and feel like my arm is missing. That being said, please ignore the blurry shots and just appreciate the cheap and easy craft.

We love the felt birds that we saw on Purl Bee. Their kits sells for $45.00, you read that right $45.00, not $4.50 but $45.00! Sure we used the cheapo polyester felt from the craft store and our total came to more like $1.00 per bird. Love that!

Here is what you need for one bird:
  • 1 sheet of white/cream felt
  • 1 sheet of colored felt
  • Coordinating embroidery floss
  • Ribbon
  • Scissors
  • Template
  •  2 Pins
  • Needle
The cocktail for the day was a nice bottle of champagne - cause we are fancy like that.

Step 1:
Cut two bird bodies out of the white felt following the template. Then cut out two birds with the colored felt staying a little bit outside of the template so you get a nice overhang.


Step 2: Cut wings out of colored and white felt and sew them to the white layer.

Step 3: Cut your ribbon to desired length and sew that in between the colored layers.

Step 4: Using a running stitch, embroider around the birds body. The tail is split, which I don't have a good picture so you will just have to trust me. As you embroider you will split the colored section apart at the tail. Make sense?

Step 5: Pour yourself another glass of champagne cause your are done!
 

Thursday, November 11, 2010

My New Alarm Clock

pitter patter whoosh pitter patter whoosh
Is that what I think it is? My fears are confirmed as I hear the child gate opening...
"Mom, get up. Mom, the suns up. Mom, are you awake now?" Imagine that mantra repeating over and over again until I am standing up straight on two feet.

This is how I wake up every morning since my son has learned he can get out of his big boy bed and is allowed to do so once the sun is up. Lately I have been getting up around 4:30 - 5:00 with Baby Girl, feeding her and laying her back down right about the same time my husband's two alarm clocks go off. He is out the door by 6:00ish and then I have about an hour to try and fall back asleep before I hear the sound of feetsy pajamas across the hardwood floors.

My friend recommended getting a television for our bedroom to buy a couple more minutes in the morning to lounge in bed but I just can't. I wish our only other TV would go away, but that isn't happening anytime soon.

Another thought I like to entertain but consider more of a pipe dream than an actual option is staying up after putting Baby Girl back to bed. Think of everything I could get done! I could give meditation a shot, the house work would be done before the sun came up and dinner could be in the crock pot before 8:00 am. That just isn't going to happen people.

For now I am just going to be grateful that Little Man now comes in my bedroom to see if I am awake rather than yelling it from the couch - that phase lasted about two weeks. Not only did I benefit from the wake up yell but his little sister did too.

Maybe my morning wake up call would be easier to hear if I stopped typing this and tried going to bed earlier...

Tuesday, November 9, 2010

Sashiko - Asa-no-ha

I was finally able to check this project off my list last night by turning my Sashiko sampler into the pillow it wanted to be. This also happens to correspond with House On Hill Road's Pillow challenge. I can't make one pillow a day but maybe I will get some craft cred for making one pillow.

 
This is the Asa-no-ha pattern from Purl Soho (I want to live there). I just read that that translates into Hemp Leaves. I'll just leave it at that.

I really enjoyed this embroidery/quilt (depending on who you ask) project. Very meditative and the best part is that is was just a running stitch. I am sure I didn't follow the directions on how to turn corners to avoid puckering, but once it was stuffed you can't even tell - Score!
Here is my dog looking less than enthusiastic about the pillow. She clearly doesn't have an eye for the finer things in life.

Sunday, November 7, 2010

Handmade Holiday Exchange

Two of my favorite things: 
1. Handmade gifts
2. Packages in the mail
Why not combine the two?

Join me for the first annual Tots and Bottoms' Handmade Holiday Exchange so we can spread our crafty love around the country. 

To participate in Handmade Holiday Exchange and receive a handcrafted item for yourself or to give this holiday season follow these simple steps:

1. Become a follower of the Tots and Bottom's Blog and/or join us on Facebook
2. Email (TotsAndBottoms (at) Gmail.com) your address and I will send you the address of another participant
4. Create a handmade item between $5 and $20
5. Mail your creation to the address sent to you by December 18, 2010
6. You can post in the comments section what you are making if you like, but this is just good clean fun and not required

Rules:
1. Please don't sign up unless you are actually going to participate because that is just sad
2. Items have to be handmade
3. I am not responsible if you do not receive an item, but still want to know
4. Non-perishable items only
5. US residents only

I would love to post pictures of what everyone is creating so please send me pictures of what you make/receive.

Help spread the word by adding the Handmade Holiday Exchange button to your blog. I wasn't able to make the picture link back to this post so don't forget to add that, or shoot me an email telling me what I am doing wrong!


Photobucket


Yay for handmade!

Friday, November 5, 2010

Tis Almost the Season

It has started... the first toy catalog arrived in the mail yesterday along with a severe case of "I want this." My kids do not have a lot of toys and what they do I have I would say they play with about 30% of them. Last year for Christmas M got so many toys that he got bored opening them. To add to the chaos his birthday is just a couple days after Christmas.

This year I vow to control my spending - one largish gift for each kiddo and then a couple smaller items. I am going to try and make the majority of the gifts such as; crocheted food, counting bean bags and new hats and then a couple store bought toys.

Hubby made this wonderful toy box for M that fits the majority of his toys. I would like him to make G a wooden doll pram. Aren't these adorable!

I hope I can encourage you to also cut back on the junk and think quality over quantity. Do you agree or am I just a Scrooge?

Thursday, November 4, 2010

Fresh Bread

My friend recommend I check out the book "Artisan Bread in Five Minutes a Day" by Jeff Hertzberg and Zoe Francois. Seeing as I am on a quest for a bread recipe I can actually conquer I figured it was worth the $13.49 Amazon is currently selling it for.

http://www.artisanbreadinfive.com


The basic idea is that you mix up enough dough for a couple days, let it rise, stick it in the fridge (stick it in the fridge, stick it in the fridge - sorry, G Love and Special Sauce tangent), and when you are ready for a fresh loaf of bread you pull out some dough and bake. Pretty simple!


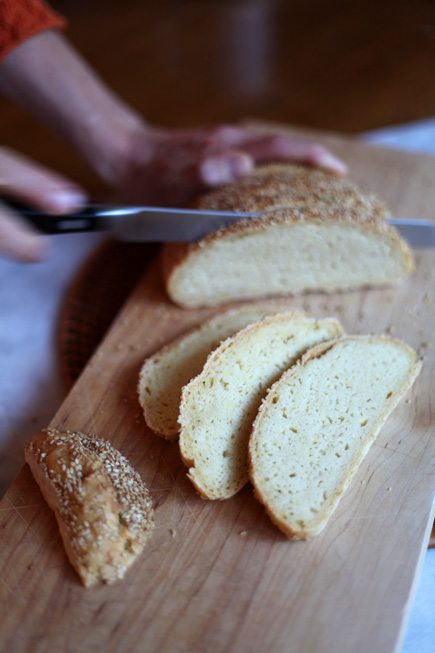
I was a little skeptical. Where was the proofing of the yeast, the kneading the long rising times? Gone. The only downside I have found to this system is that because the bread continually comes out perfect, even without the steam bath and baking stone they recommend, we now have two 6 qt. tubs in our fridge that take up a lot of real estate. I think that is a fair trade considering we are eating bread that contains no strange chemicals or tons of unnecessary sugars.

So far I have made the basic boule recipe and the peasant loaf. So yummy.

If you are in search of gluten-free recipes, it looks like their new book, "Health Breads in Five Minutes a Day."  has a chapter devoted to gluten-free. Their web site also has some great tips that you should check out if you are interested in serving up great homemade bread. 

Related Posts Plugin for WordPress, Blogger...